Leathercraft is a term that is used to describe the art of making leather goods. The process of leather crafting can be broken down into three main parts: tanning, dyeing, and finishing. Whether you are looking to make your own leather bag, belt, or shoes, this tutorial will teach you everything you need to know.
Tanning: This step is the process by which animal skins are turned into leather. There are two types of tanning – vegetable and chrome. Vegetable tanning uses natural materials such as tree bark to create the tannins while chrome tanning uses chromium sulfate to make the tannins.
Dyeing: This step is where the color of the leather is added to it. The dyes are usually made from natural sources such as plants or insects and they can be applied in one of two ways: surface dyeing or through dying.
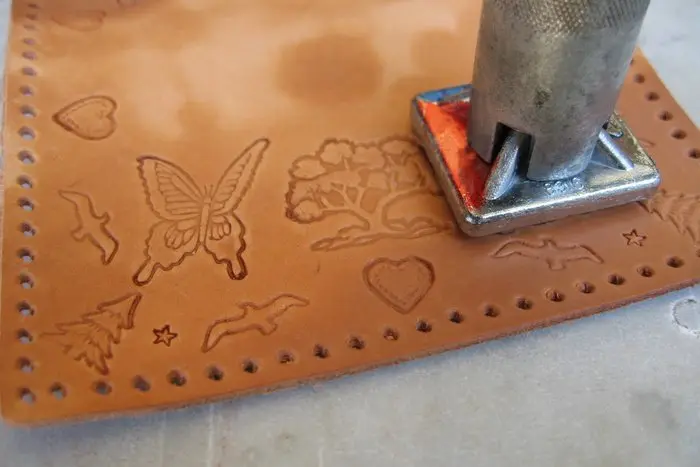
Stamping: This step is where the leather is stamped so it can be cut into pieces more easily.
Stamping Leather Guide for Beginners
There are a lot of ways to stamp leather, but for the purpose of this article we will be discussing how to stamp with a knife.
Stamping is an old technique that has been around for centuries. It is not only a great way to make your own designs, but it’s also a great way to personalize items as well.
Stamping leather is a craft that many people find enjoyable. But it can be difficult to know where to start. This article will guide you through the process of stamping leather for beginners, from preparing your tools, to choosing a design, and finishing the project.
The first step in stamping leather is to prepare your tools. You will need a design, some ink pads or paint pens, and some stamps. You may also want to have some paper towels or rags on hand for wiping off excess ink after you finish stamping.
Selecting a design is the next step in how to stamp leather for beginners. There are many designs available on the internet that you can print out and use as templates for your work. If you want more options, there are also plenty of books with
The Essentials You Need To Start Stamping Leather
There are a lot of tools and supplies that you can use when it comes to stamping leather, but some are more important than others. In this post, we will go over the essentials that you need to get started.
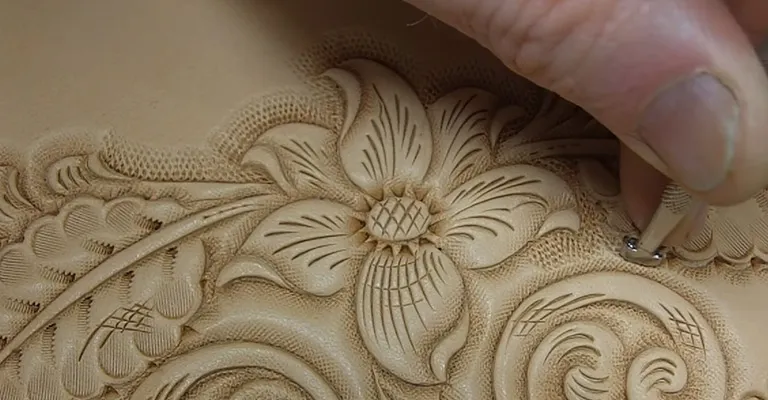
The first tool is a leather mallet which is used for shaping the leather and flattening it out. You also need a set of stamps which are used for creating designs on the leather. A roller can be helpful for smoothing out wrinkles in the leather as well as getting a uniform texture on your finished product.
A rotary cutter can also be helpful if you want to cut your pieces of leather into strips or squares before stamping.
How To Finish The Edge on Your Stamped Piece of Leather
The edge on a leather piece is the part that is not stamped. This is where the leather piece meets the edge of the table and is visible to anyone who looks at it. It’s okay if this area isn’t perfect, but it should be neat and free of any jagged edges or tears.
In order to finish an edge on a leather piece, you need to use a burnisher. A burnisher can be any type of metal object that has been shaped into a point or rounded shape with a handle on one end. The point or rounded shape will be used to smooth out the rough edges and create a neater finish for your piece of leather. The needle is inserted through the leather, going in and out as you pull it.
Final Words
The final words of this article are that stamping is an easy and affordable way to personalize your leather goods. Whether you use a stamp or a stencil, the end result is always a personalized product.